Spring AI Prompts with Example
Author: Yakambram K
In this tutorial, we will set up a Spring Boot application, configure Spring AI, and create prompts manually to interact with AI models via ChatClient.
Introduction
Prompts are essential for directing AI models to generate specific outputs. In this tutorial, we
will create and use
prompts directly without relying on the PromptTemplate class, giving you more control
over the prompt creation
process. We will use Spring AI to interact with OpenAI's GPT
models through the ChatClient abstraction.
You can use the PromptTemplate class to dynamically generate prompts for AI model interactions via ChatClient.
types of large language models (LLMs) without coupling with the actual LLM model.1. Setting Up the Project
Step 1: Create a New Spring Boot Project
Use Spring Initializr to create a new Spring Boot project. Include dependencies for Spring Web and Spring AI.
Using Spring Initializr:
- Go to start.spring.io
- Select
- Project: Maven Project
- Language: Java
- Spring Boot: 3.0.0 (or latest)
- Dependencies: Spring Web
- Generate the project and unzip it.
Step 2: Add Dependencies
In your project's pom.xml, add the necessary dependencies for Spring AI.

2. Configuring Spring AI
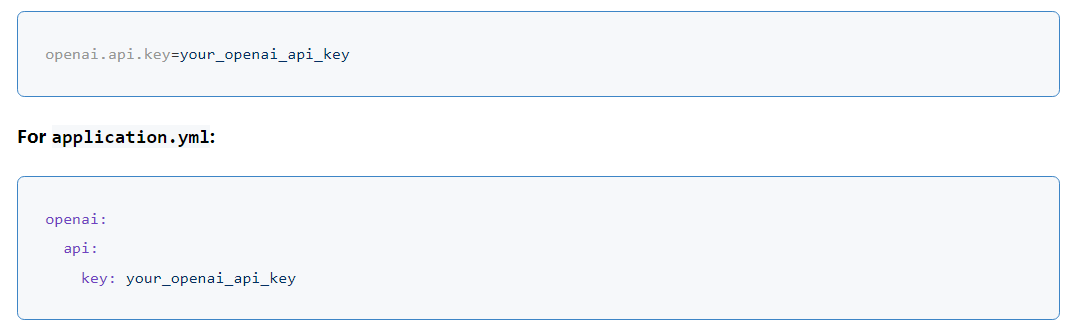
Step 1: Add API Key to Configuration
Add your OpenAI API key to application.properties or application.yml.
For application.properties:
Step 2: Configure Spring Beans
Create a configuration class to set up all necessary Spring beans, including the OpenAiClient, ChatClient, and PromptTemplate.
package com.example.demo.config;

import org.springframework.context.annotation.Bean;
import org.springframework.context.annotation.Configuration;
import org.springframework.ai.openai.OpenAiClient;
import org.springframework.ai.openai.OpenAiChatClient;
import org.springframework.ai.openai.ChatClient;
import org.springframework.ai.prompts.PromptTemplate;

@Configuration
public class AppConfig {

@Bean
public OpenAiClient openAiClient() {
return new OpenAiClient();
}

@Bean
public ChatClient chatClient(OpenAiClient openAiClient) {
return new OpenAiChatClient(openAiClient);
}

@Bean

public PromptTemplate jokePromptTemplate() {
return new PromptTemplate("Tell me a {
adjective} joke about {topic}");
}
}
3. Creating and Using Prompts
Step 1: Create a Service to Use the Prompt
Create a service to use the PromptTemplate for generating prompts and interacting with the AI model through ChatClient
package com.example.demo.service;

import org.springframework.ai.openai.ChatClient;
import org.springframework.ai.prompts.PromptTemplate;
import org.springframework.ai.openai.model.ChatRequest;
import org.springframework.ai.openai.model.ChatResponse;
import org.springframework.beans.factory.annotation.Autowired;
import org.springframework.stereotype.Service;

import java.util.Map;

@Service
public class PromptService {

private final ChatClient chatClient;
private final PromptTemplate jokePromptTemplate;

@Autowired
public PromptService(ChatClient chatClient, PromptTemplate jokePromptTemplate) {
this.chatClient = chatClient;
this.jokePromptTemplate = jokePromptTemplate;
}

public String generateJoke(String adjective, String topic) {
// Create the prompt with the provided variables
String prompt = jokePromptTemplate.create(Map.of("adjective", adjective, "topic", topic));

// Create a ChatRequest with the generated prompt
ChatRequest request = new ChatRequest();
request.setMessage(prompt);

// Get the response from the ChatClient
ChatResponse response = chatClient.sendMessage(request);

} return response.getReply();
}
Step 2: Create a Controller to Expose the Service
Create a controller to expose an endpoint for generating jokes.
package com.example.demo.controller;

import com.example.demo.service.PromptService;
import org.springframework.beans.factory.annotation.Autowired;
import org.springframework.web.bind.annotation.GetMapping;
import org.springframework.web.bind.annotation.RequestParam;
import org.springframework.web.bind.annotation.RestController;

@RestController
public class PromptController {

private final PromptService promptService;

@Autowired
public PromptController(PromptService promptService) {
this.promptService = promptService;
}

@GetMapping("/joke")
public String getJoke(@RequestParam String adjective, @RequestParam String topic) {
return promptService.generateJoke(adjective, topic);
}
}
4. Testing the Integration
Step 1: Run the Application
Run your Spring Boot application. Ensure the application starts without errors.
Step 2: Access the Joke Endpoint
Use Postman, curl, or your browser to test the endpoint. For example:
http://localhost:8080/joke?adjective=funny&topic=technology
You should receive a joke response generated by the AI model based on the prompt template.
Conclusion
This tutorial demonstrated how to set up and use PromptTemplate with ChatClient in a Spring Boot
application
using Spring AI. You learned how to create a PromptTemplate, use it in a service, and expose an
endpoint to
interact with the AI model. This setup allows you to create dynamic and structured prompts,
enhancing the
capabilities of your AI applications. Explore further customization and enhancements to leverage the
full potential
of prompts in your Spring Boot projects.
For more detailed information, refer to the Spring AI documentation.